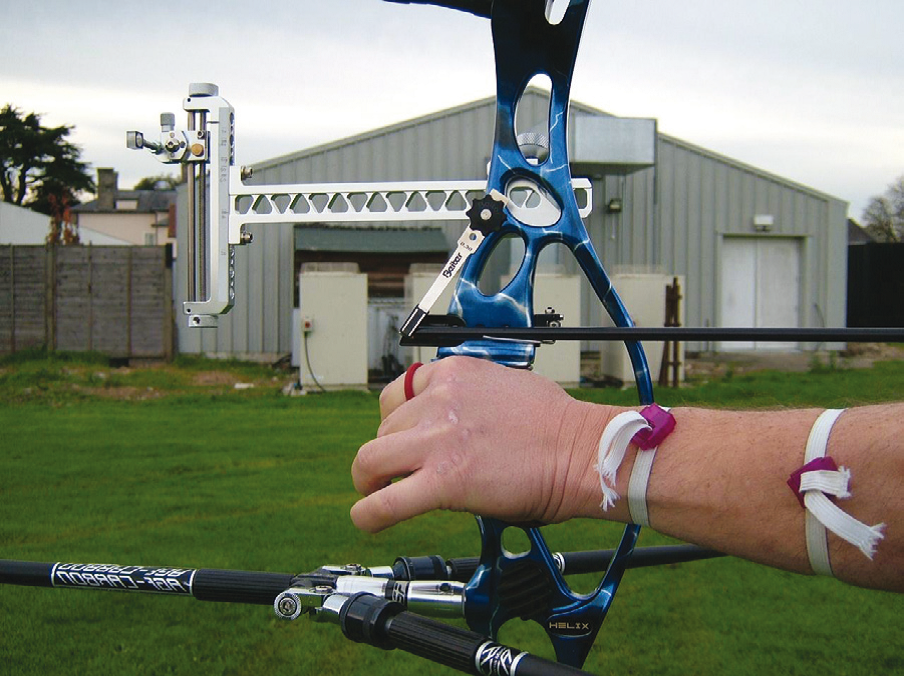
A Thin Metal Strip
If you shoot recurve target archery at some point you will have seen other archers using a thin metal strip on the riser to check their draw length when shooting an arrow. This piece of kit is more commonly known as a clicker. A popular question among beginners and archers who have been shooting for a few months is if and when should I start to use a clicker. Unfortunately there are no hard and fast rules and you will find that many people have very differing opinions. For target archery a clicker is considered to be an essential item for consistency and accuracy. There are, of course, top archers who do not use a clicker, however the majority do. But just as importantly, also be aware that for a beginner or novice archer the improper use of a clicker will hamper the development of technique. In this article I will try to explain the use, setting up and the types of clickers available, which should put you in a better position to decide whether a clicker is right for you.
When to consider a clicker
Most coaches say “wait until your form is consistent.” The key to shooting with a clicker is good control of the shot, which includes proper use of the back muscles and good shooting form. Archers need to concentrate on good form first. A clicker basically tells you when you have drawn the arrow back the right distance to let it go. It is important that when shooting with a clicker you control the shot rather than the clicker controlling you. The theory of shooting with a clicker is simple: draw the arrow, aim and expand, pulling the arrow through the clicker, and at the signal of the click, loose the arrow.
Types of clicker
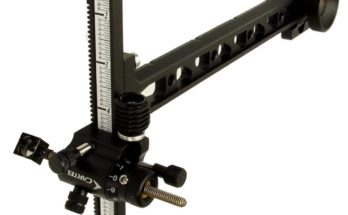
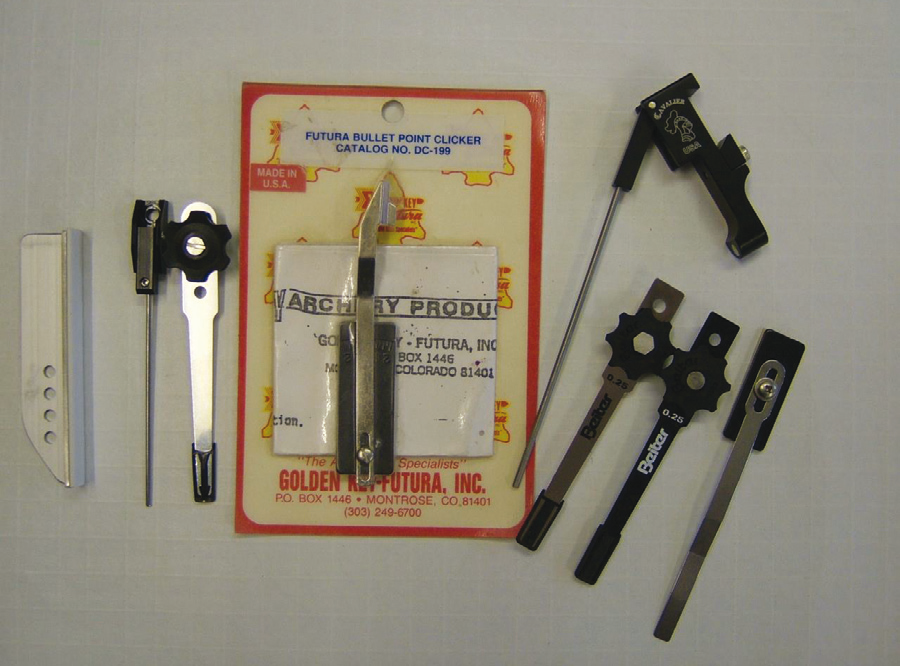
There are two main types of clicker: the blade type that screws or sticks on to the riser, and magnetic clickers with a thin wire which can be attached to the bow or sight extension depending on the model.
Choosing a clicker
The correct positioning of the clicker on the riser is very important and you need to make sure that the one you choose will be long enough so that you can adjust it correctly. Depending on your riser you may also have the option to fit an extension plate which allows you to shoot a longer arrow and still use a clicker, which is screwed or stuck to the riser. If you do not have this option there are extension plates that you can buy or you can invest in a magnetic clicker, which attaches to the sight bar. A standard clicker uses the blade hitting the riser to make the sound and the magnetic ones use the magnet and the wire.
Because there are so many different clickers to choose from I suggest checking out other risers to see what model they use, but also speaking to a senior club member or a coach in order to make sure you get one that suits you and fits your bow.
Setting up a clicker
It is very important when setting up a clicker that you speak to a coach or a senior member of your club who is able to judge that your form is correct when you are at full draw and that you are not hunched up or over-extending. Firstly, attach the clicker to the bow and roughly set it to the right draw length position. Next set up a target or get to a blank butt at about 18 metres and warm up and shoot a couple of dozen arrows without using the clicker. After the warm up get your helper or coach to watch you draw up and shoot a few more arrows, again without using the clicker, but most importantly making sure he or she checks that your form is good and is also mentally noting the position of the point of the arrow at release. Now get your helper to position the clicker so that at full draw approximately 5mm of the arrow is still under the clicker just at the point before you aim.
The next bit is all about trial and error and as you have not shot an arrow through the clicker before it will seem strange. Draw your arrow to reference, line up your shot, and expand to bring the arrow back. There will be a “click”, and you can release the arrow. Try to do this in a calm and correct manner and with the same follow through as before you started to use a clicker. It sounds easy but don’t be surprised if the first shot is a complete surprise!
Exercises for control
Now that the clicker has been set and you have shot a few arrows don’t go rushing off to shoot a round. Stay shooting a blank target or wall for as long as possible while you get used to it. During the sequence your helper should be checking your form and the position of the arrow point at full draw. You may find the clicker position needs to move, but your helper or coach will be able to do this for you.
Concentrate on good form and the feel of the shot. The idea of this is to help you shoot smooth shots, without anticipating the clicker going off. Remember that if the shot does not feel right, or you are struggling to get through the clicker, to come down and start the shot sequence from scratch.
Training
Over the next few weeks it’s worthwhile to practice blank butt for as long as possible in order to get the true feeling of the clicker. The key when shooting with a clicker is to make it part of your shot routine so that you do not have to think about it at all, and that simply takes time.
Make sure you have someone you can rely on who can keep an eye on you over the next few weeks or even months while you get used to the clicker so they can monitor your progress. I cannot stress this enough – those who hate the clicker or feel they do worse with it than without it have usually gone through the setup, and then been left to their own devices without someone checking on them and the position of the clicker through this time.
So that’s the clicker, such a simple device but with a lot of power. It takes time to set it up, and it takes guidance, but the long-term benefits of a set draw-length are widely known.
First seen in issue 521 March/April 2014, by Caro Geelen